Mikihands editor lets you upload images and insert them into your post using Markdown syntax.
1. Upload an image and copy the code
- Find the Images (optional) area near the bottom of the writing screen.
-
Drag and drop a file, or click the upload area to select an image. Uploaded images are automatically resized for better loading performance.
-
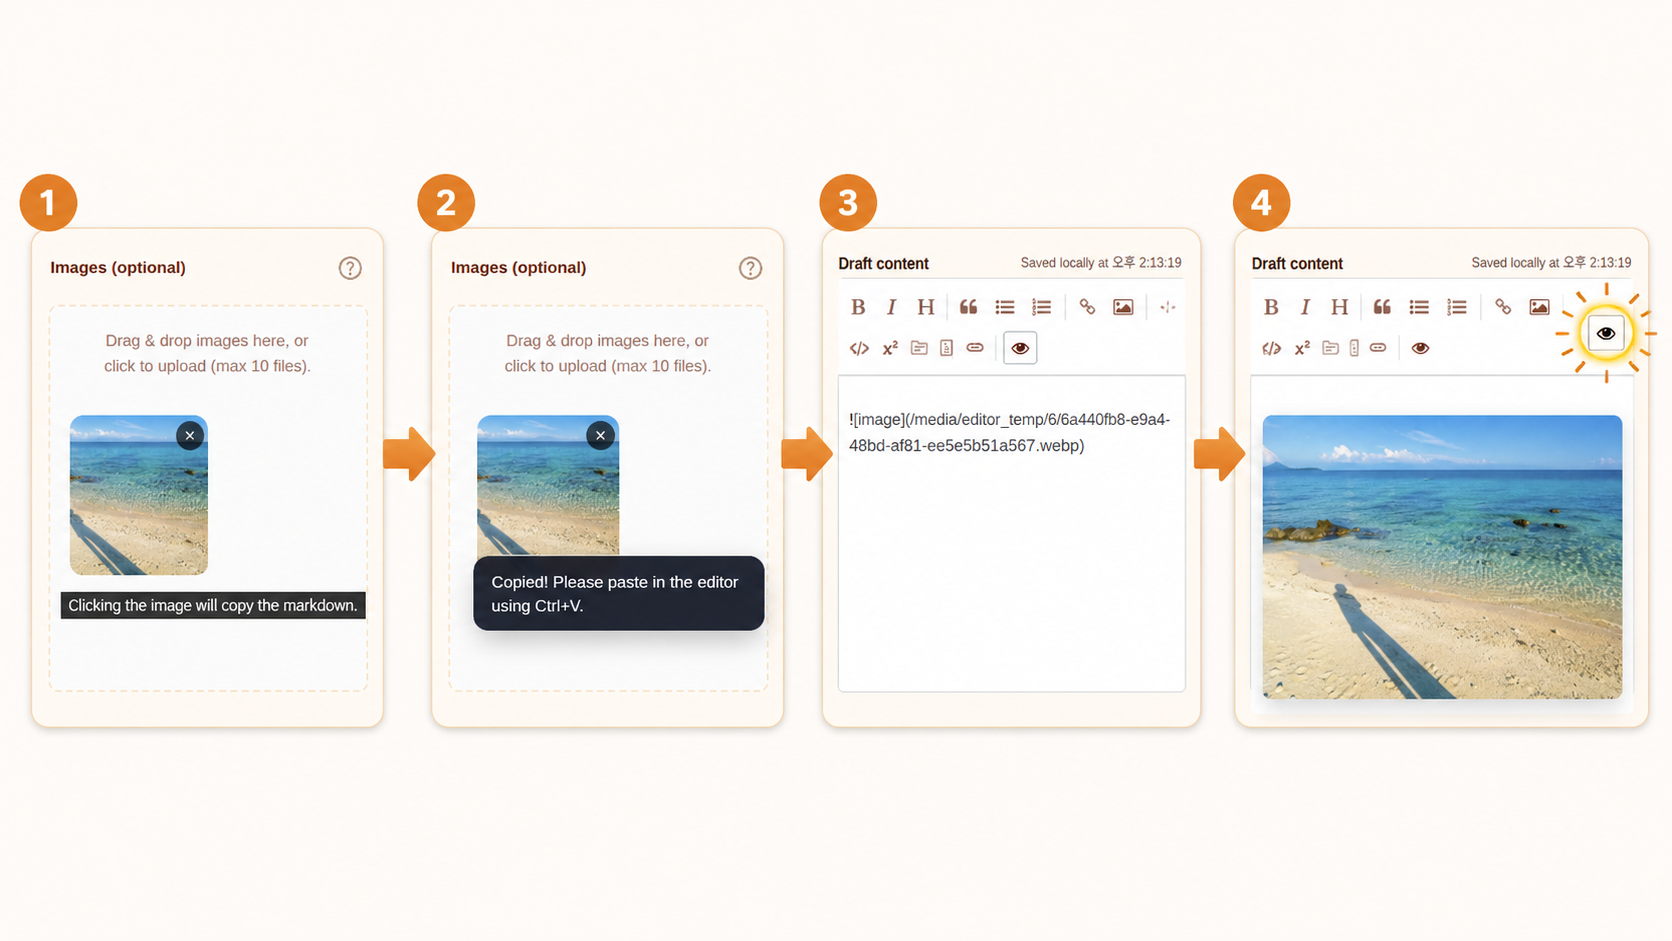
Once the upload is complete, click the generated image thumbnail. The Markdown code for inserting the image will be copied automatically.
-
Paste it (Ctrl+V) wherever you want the image to appear in the editor.
2. Understanding the image syntax
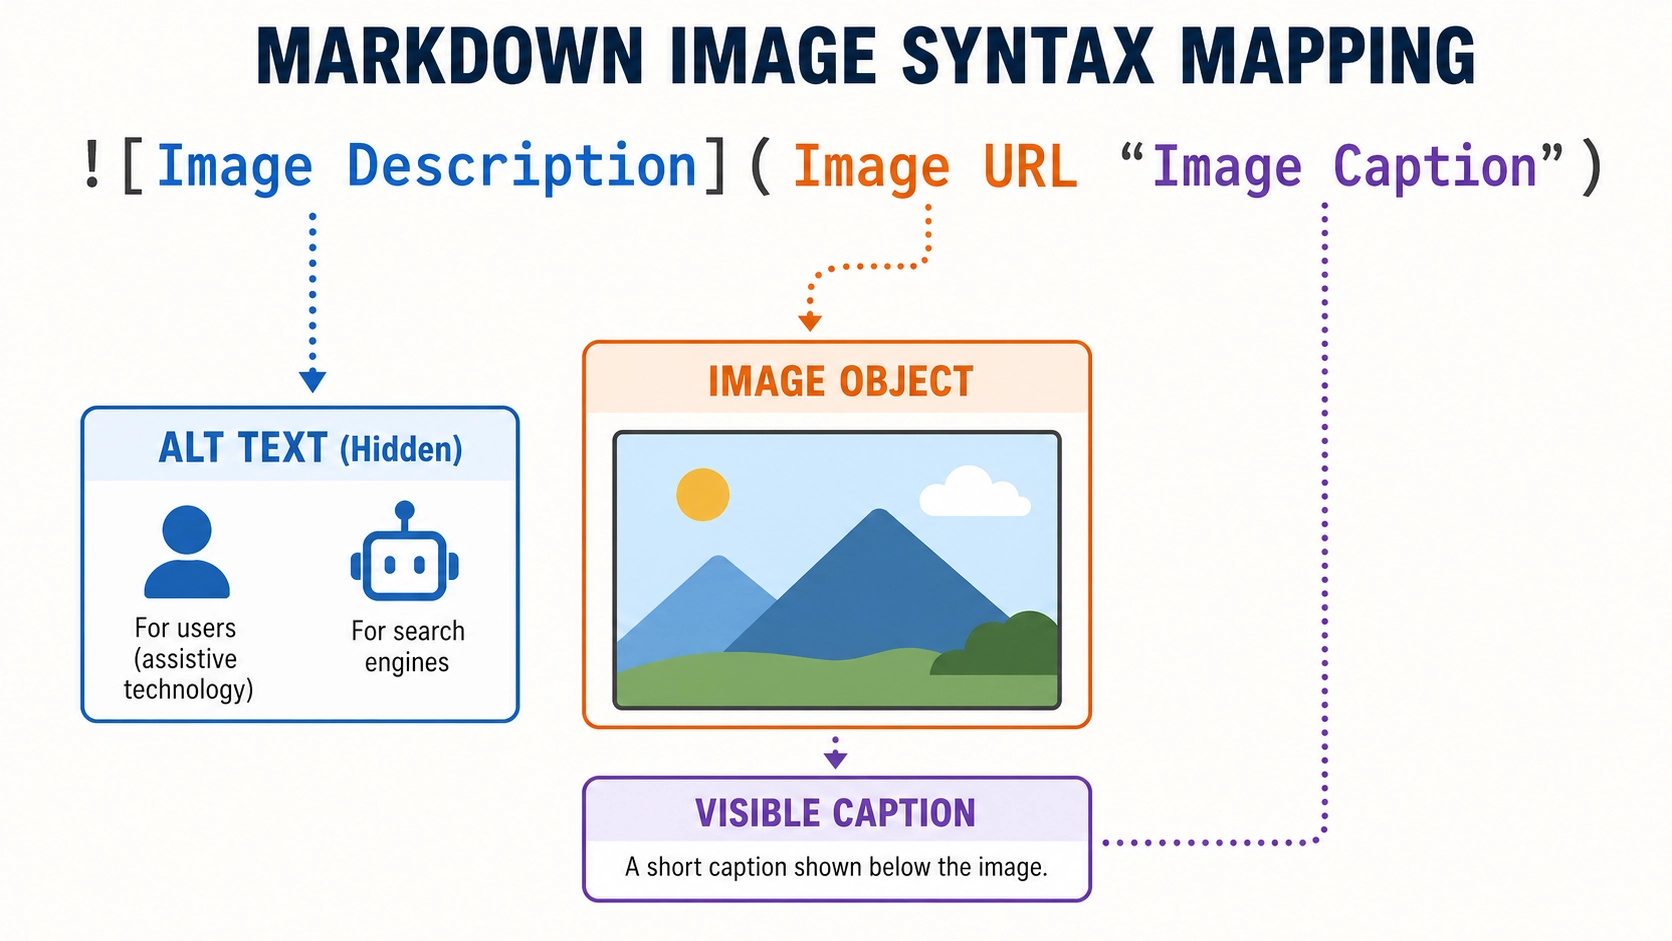
You can edit the copied code to add image description text, also known as Alt Text, and an image caption.
-
Image description (
[ ]): This text is shown when the image cannot be displayed. It is also used by search engines and screen readers, so it is best to briefly describe what the image shows. -
Image caption (
" "): Add this after the image URL, separated by one space. It appears as a small description under the image on the published post page.
3. Usage examples
Choose one of the following methods depending on the purpose of the image.
① Basic insertion, without a caption
Use this when the image is already explained clearly enough in the body text.


The image is displayed cleanly without a caption underneath.
② Insertion with a caption, recommended
Use this when you want to give readers extra context, such as the background, source, or situation behind the image.


A small gray caption is rendered under the image.
💡 Writing tips
-
Accessibility: The more clearly you describe the image inside
[ ], the easier it is for search engines and screen readers to understand it. -
Readability: Use captions (
" ") when you want to add context to a photo. They help readers understand the flow of your post more quickly.