Welcome to Mikihands Blog! Your first post doesn't have to be perfect. Follow this guide to introduce yourself and get started.
1. Start Writing (Entry)
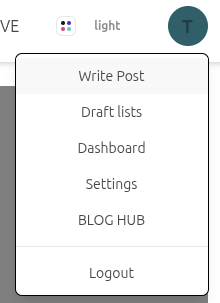
- Path: Click your avatar in the top right → Select [Write Post].
- Tip: Focus on the title and body first. You don't need to use every feature right away.
2. Master the Editor (Editor)
| Area | Key Features & Tips |
|---|---|
| Body (Markdown) | You can write in plain text. Use AI Help later to automatically apply Markdown formatting. |
| Image Insertion | Drag and drop files into the image area. Click the thumbnail to copy the insertion code. |
| Writing Help | [Expand] helps with drafts, while [Refine] improves flow and organizes Markdown. |
| Meta Info | Stuck on tags or slugs? Click [Get Suggestions]. Our AI will recommend values based on your content. |
3. Save Draft & Preview (Draft & Preview)
Before going public, click [Save as Draft] to see how your post looks on the actual blog.
- Are images and links in the right places?
- Is it easy to read on mobile?
- Glossary: Use this to keep specific terms (e.g., brand names) consistent across AI translations.
4. Connect Knowledge with Topics
"Topics" turn your blog into a knowledge hub.
- Wrap a specific word in double brackets, like
[[Django]]. - This automatically links the word to a dedicated Topic page. (You can always add these later.)
5. Publish & Verify (Publish)
Once you're ready, hit [Publish]!
- Edits: You can update your post anytime after publishing.
- Check: Verify that the URL opens correctly and the title looks perfect.
💡 What’s Next?
Now that your first post is live, explore more advanced features: * [Understanding Full vs. Section Editing] * [Managing Versions with History] * [Building Knowledge Maps with Topics]